Blog
Migrating from Gatsby to Next.js
Recently I decided to migrate my website from Gatsby to Next.js. There were several reasons for it, which I'll explain in detail below, but the main reason was that I primarily work with Next.js in clients' projects, so it made sense to me to migrate my website to it.
Next.js provides fantastic documentation on what you need to do to migrate successfully from Gatsby no Next.js.
Nevertheless, there are some things I wish I had known when getting into it. In this blog post, I'll document everything about the process, what to look out for, and what I've struggled with to make your migration to Next.js a success.
Table of Contents
- My Reasons to migrate from Gatsby to Next.js
- Updating package.json and dependencies
- Static assets and compiled output
- Creating Routes
- Styling
- Links
- Data fetching
- Images and Image Optimization
- Site metadata
- SEO
- Conclusion
My reasons for migrating from Gatsby to Next.js
My main reason for migrating from Gatsby to Next.js was convenience. In client projects, I solemnly use Next.js. The last project, where we used Gatsby, is two years old. I'm just much more used to it and faster.
I can't say anything terrible about Gatsby. On the contrary, when I chose to use it initially for my website, I was pleased with it. The ton of plugins enabled great features and improved my website a lot.
But at the point where I am now, I don't like the GraphQL approach anymore, and
I'm happier with the getStaticProps approach by Next.js.
Also, I couldn't get Typescript to run on the project of my website. This is not Gatsby's fault, but it was another reason for me to migrate.
Using Gatsby with the ton of plugins felt great at first. I needed a sitemap so I installed a plugin for it. If you want to have an RSS feed here, add this plugin. But with time, it felt like relying heavily on jQuery years ago. A lot of stuff is happening under the hood, it works, but I don't understand it.
Next.js doesn't use a plugin system and includes more in the framework itself. So you can play more with it yourself, which I like today. So these are the reasons I chose to migrate from Gatsby to Next.js. So now, let's talk about the steps to achieve that goal!
Updating package.json and dependencies
To get started with the migration, the first step you have to take is to
delete all the packages from your package.json with Gatsby in their name.
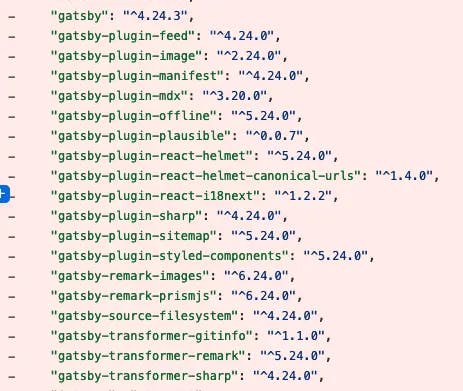
Also, make sure to delete Gatsby-specific scripts from the package.json. After
getting rid of all the Gatsby stuff, we can get into Next.js.
Before installing Next.js, you have to check your React Version. I was still on 17.x.x. This meant upgrading React first!
npm i react@latest react-dom@latest
Now we are ready for Next.js. Install it and add the Next.js specific scripts in your package.json.
npm i next
"scripts": {
  "dev": "next dev",
  "build": "next build",
  "start": "next start",
},
My Gatsby site didn't have TypeScript, so I also added this. First, you have
to create a tsconfig.json. Next.js will automatically fill it. Then install
Typescript and the types for react, react-dom and node.
npm i typescript @types/react @types/react-dom @types/node
It's amazing how Next.js automatically reacts to that and configures TS for your Next.js project. Nice!
Static assets and compiled output
When we have the packages and dependencies in place, it's time to get into the project.
In Gatsby, the public directory has a different meaning than in Next.js. In Gatsby, it's the place where the compiled output lands. In Next.js, it's used for static assets.
So we have to adjust that. The best way to resolve that, according to the
Next.js docs, is by removing .cache and public from .gitignore, deleting
both folders, and renaming the static folder to public.
Then add the .next folder to your .gitignore.
In Gatsby, everything is inside a src folder. If you start a new Next.js project, they are not using an src folder, and everything is on root. I got rid of the src folder, but it's not mandatory.
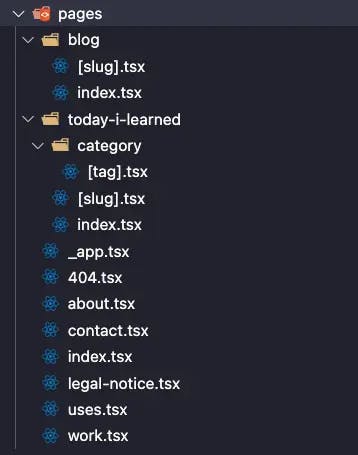
Creating Routes
Page routes work differently in Gatsby and Next.js. In Gatsby, you have to
use the createPages function in gatsby-node and use a template file for
every page. In Next.js, you use folders to create routes for pages.
Therefore I created a pages directory and moved every template file as a page inside of it.
I followed the documentation for dynamic pages and used the bracket syntax and
getStaticPaths. It was straightforward to get the route creation to work.
Styling
In Gatsby, global CSS files are imported in gatsby-browser. To use global
CSS in Next.js, you must create an \_app.js file and import it there.
import '../styles/styles.css'
import '../styles/night-owl.min.css'
import type { AppProps } from 'next/app'

function MyApp({ Component, pageProps }: AppProps) {
  return <Component {...pageProps} />
}

export default MyApp
I also took the opportunity to migrate from styled-components to TailwindCSS. It was complicated to use styled-components in Next.js, and I rarely use them in client projects because I'm more productive with TailwindCSS.
Links
Both frameworks offer a Link component, but the syntax is slightly
different. Gatsby's Link has a to prop where you have to pass the URL in, and
in Next.js, it's called href. So I changed this everywhere and completed the
next step of the migration.
- <Link to="/blog/">Blog</Link>
+ <Link href="/blog/">Blog</Link>
Data fetching
Data fetching is the topic that shows the most significant difference between Gatsby and Next.js.
In Gatsby, the default way to fetch data is to use GraphQL. In Next.js, you
have different options: getServersideProps for server-side rendering or
with getStaticProps and getStaticPaths for static site generation.
To migrate the data fetching process, you have to delete every GraphQL query and
integrate your preferred data fetching method in Next.js. For me, this meant
adding the getStaticProps function in every page file and querying there for
the data needed.
I'll write a different blog post about how I migrated from querying my blog posts in Gatsby with GraphQL to doing it in Next.js. It's an interesting topic on it's on, and it would make this blog post too big. As soon as I publish it, I'll link it here!
Images and Image Optimization
In Gatsby, I used the GatsbyImage Component heavily for responsive images.
Next.js has something similar. The main difference is that it doesn't optimize
images at build time as Gatsby does, but on-demand as users request them.
You can import it from next/image, and the usage is pretty straightforward.
import Image from 'next/image'

return (
  // ...
  <Image
    alt="a picture of Marco Heine"
    src="/images/marco-heine.webp"
    className="mb-10 max-w-[300px] sm:mb-20"
  />
)

// ...
Site metadata
In Gatsby, you can define metadata, like the title or author, in a gatsby-config.js file. This data can be queried via GraphQL. For the migration to Next.js, you can move this data into a config.js file and import it whenever needed.
SEO
Gatsby encouraged everyone for a long time to use react-helmet. They have a
built-in solution now, but my project still used react-helmet. In Next.js, you
can use next/head and add every meta tag as children.
import Head from 'next/head'

export const Head = () => {
  return (
    <Head>
      <title>Marco Heine's website</title>

      {/*  add meta tags here */}
    </Head>
  )
}
Optional: Migrating from Netlify to Vercel
As all my client projects are hosted on Vercel, I also wanted to migrate my website from Netlify to Vercel. This is optional. You can migrate your website from Gatsby to Next.js and still host it on Netlify.
But if you decide to use Vercel, they also have a fantastic migration guide.
Conclusion
I don't know how long it took me to complete the migration. But it was a smooth process from the beginning to the end. I had no trouble at any time, and if you're also thinking about doing it, I recommend it.
I don't know if the Performance of my website improved much because I already had high Lighthouse scores with Gatsby. But I took the time to change and refactor some things independent of the migration, which made my website even more accessible and faster.
If you're curious and have read until this point, check out the full Pull Request for the migration
Sources
I hope you enjoyed this post and learned something new. If you have any questions, feel free to reach out to me via Email.
If you want to support me, you can buy me a coffee. I would be very happy about it!
☕️ Buy me a coffee ☕️I wish you a wonderful day! Marco